Q1. Are you pretty much following Skip's method?
A. Pretty much. There are a few things I did differently:
1. I built a foundation instead of building on piers. I am building on an irregular granite cliff so one foundation wall is 8 feet high and the opposite wall is 8 inches high. The high-ceilinged crawl space underneath will be useful as a storage room so I decided on the foundation. I don't think the building dept would have approved 8-foot tall piers anyway.
2. I did not build with full-length logs and cut windows and doors later. I installed the rough door and window frames as I went up and cut the logs to fit against these. That was because I couldn't find a cheap supplier of logs (timing is everything) and in fact, I couldn't find a supply of long logs at all. I harvested most of the long logs I used from my property.
3. I didn't use corner lifting poles. This was because of my irregular site. You couldn't get a log up to three of the four walls at all. Only the wall facing the cliff was accessible. My logs were delivered to an area at the base of the cliff a hundred or so feet away from the building, and 30 feet lower.
4. I didn't use block and tackle to lift logs. (see Q2 below).
5. I used TJI rafters on 16" centers with 3/4" OSB and a metal roof on top. I will have to insulate from inside.
6. I put a couple extra purlins in rather than just the ridgepole and the log walls. My roof is on the order of 300 lb./sq. ft. It ended up that way because the bldg. dept. forced me to have R38 in the ceiling so I had to use 12" rafters to hold it. If I'd been thinking, I might have left out the purlins because I think the roof would have been plenty strong without them, but I had fun installing the purlins anyway.
Q2. Did you use block and tackle for lifting your logs?
A. No. I built a crane to lift my logs. The crane consisted of a 32-foot log (the mast) held vertical by three 3/4" rope guys, and a 32-foot log boom. The butt of the boom swivelled and was fastened in various ways as the crane traveled up the building as it grew. The top of the boom was connected to the top of the mast by a 4-way block and tackle and a yellow rope. For a while, I had a 1/4 ton chain hoist attached to the end of the boom, and later, I used a winch on the ground with the cable running up the boom and over a pulley at the end of the boom. To lift a log, I would typically position the boom where I wanted it by cleating the yellow rope and two ropes that kept the boom from swing ing from side to side. Then I would pay out the cable, attach the log, and run the winch or hoist to drag and finally lift the log. Each log would take several steps of rigging and pulling in this way. The final maneuver was usually having the crane hook directly above where the center of gravity of the log was to go, and the log would be choked right at the center of gravity. That way, I could gently lower the log exactly into position.
Q3. Did you do log gables or do them like Skip's?
A. I did log gables on both ends of the house.
Q4. What kind of wood are you using and what size?
A. My logs are nominally 10 inches in diameter. I have a duke's mixture of species: Doug Fir, Grand Fir, Ponderosa Pine, White Pine, Lodgepole Pine, etc.
Q5. What size home are you building?
A. It is 28x30 feet measured inside the log walls. there is also a 400 sq. foot loft and a 16x30 foot covered porch, or deck.
Q6. Do you have any pics you can share?
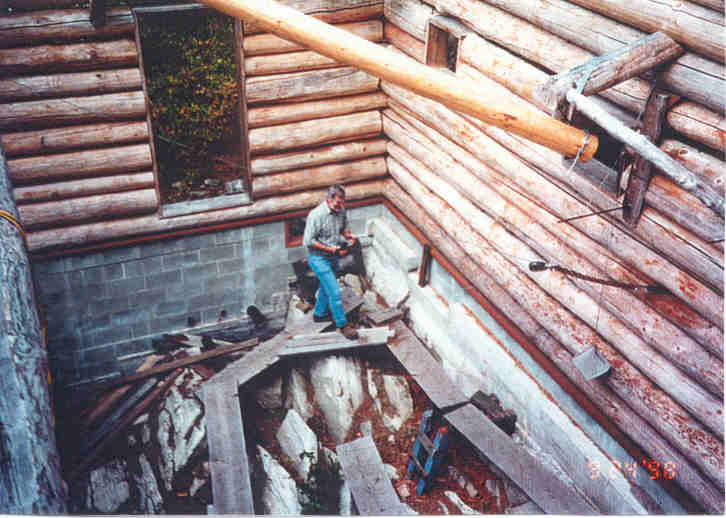
A. Yes, I have a lot of pictures. A representative sample has been posted on this site. You can see pictures of the project in sequence by starting here. You can also see pictures of visitors to the site by clicking on the people's names in the visitor section here.
Q7. What's next after the porch?
A. (4/7/03) As soon as it stops freezing at night, I will go back and finish chinking the outside. Then, there are a number of projects that I haven't really prioritized, but they include, hanging the outside back door, installing the windows, building the inside staircase, building the outside staircase, and planing and varnishing the interior logs.
Once those are finished, I can turn to some more common projects like rough plumbing, both supply and waste-water, rough wiring, and heating and ventilation. Then there is running the water pipe from the spring to the house which is a project that is independent of all the others. That's about as far ahead as I have thought. There is a lot of work yet to do.
Q8. I am curious about what finish you used on the logs.A. (12/23/02) I used TWP (I think it stands for Total Wood Protection) series 500. TWP is oil based and does not form a film on the wood. I tested TWP, Timberflex, Behr Rawhide, and Olympic Stain on a test log and let it sit out in the weather for several years before I decided what to use. But the real reason I chose TWP was that it was recommended by Jim Renfroe. He is the founder and CEO of his little company called Woodcare Systems in Kirkland. He is also the author of the book, "The Log Home Owner's Manual: A Guide to Protecting and Restoring Exterior Wood". You can check his company out at www.woodcaresystems.com .
Anyway, Jim and his associates have degrees in chemistry and biology and they do a lot of serious investigation into causes and prevention of wood failure. For example, they tell me that there are certain molds or mildews that love to eat linseed oil, so any preservative that contains linseed oil just feeds those organisms. TWP, from all their investigation, is the best stain to use when measured over a long period of time. I believed them.
Q9. What about the chinking process? What is the purpose of the galvanized nails every two inches? Also, if you are using brick motor as chinking, won't it get dry and crack and fall out as the logs expand and contract? I know (think I remember) that you used totally dry logs to start with, so there should be a minimum of checking (cracking) and twisting. But you will still get expansion and contraction due to temperature changes.
A. (12/23/02) For chinking, I first stuff yellow (or pink) unbacked fiberglass insulation in the crack. Then, I drive a galvanized nail into the bottom log every 2 inches or so, and bend them so that they stand straight up and reach 3/4 or so of the way up to the log above. Then I trowel brick mortar in so it covers the nails. The nails keep the mortar attached to the log so it doesn't fall out. I did the chinking after I had applied the stain so the stain covered the complete half-log. I will do the exact same kind of chinking on the inside. This was the method taught to us and recommended by Skip Ellsworth in his log home building course both for the inside and the outside of the walls. The major advantage that appeals to me is that the wall is permeable. That way, noxious gases and water vapor can freely leave the building without having to deliberately vent and spill huge quantities of heated air as is required if the house is air-tight.
The mortar develops vertical hairline cracks about every 10 inches almost as soon as it is dry. That means that there are about 5 nails holding each chunk of mortar in place. It's early, but from what Skip told us, I don't expect the mortar to crack up any finer than that so I don't expect it to drop out. I never thought about expansion of the logs crushing the mortar, but since I don't expect my logs to get wet, I don't think they will expand much. They are also very dry after me taking so long to get them into the building and chinked, so I don't expect them to shrink much more either. If you used this method with green logs, you would have a big gap develop above the mortar and you would have to fill that back up each year for a few years. In my case, the most I expect is that I may have to caulk a few cracks as they develop.
Speaking of cracks, another advantage of using such dry, old logs, is that the checks had already developed so I was able to orient the logs so that the checks, for the most part, are inside the wall, or if not, then on the inside of the building. So there aren't many checks, and no really big ones, on the outside of the walls.
Q10. You say your rebar spikes hold up the weight of the building, but it sounds like all the weight is on the logs. For instance, isn't the bottom log resting on the foundation, and the spike driven half way through the bottom log? Then the next log with the hole drilled in it and held in place by the spikes is resting with all it's weight on the bottom log? I don't see how the spikes do anything but keep the logs aligned.
A. I was more or less quoting my structural engineer and spoke too hastily. You are absolutely right about that bottom log. The bottom half of it does bear the weight of the building above it. So if that log shrunk a quarter of an inch in diameter, my house would settle an eighth of an inch. Except for that possible eighth of an inch of settling, the geometry of my house won't change and I don't need the slip joints or jacks that conventional log houses do.
But the rest of the logs do not bear the weight. In fact, if you look at my building right now (before the inside chinking is done) you can see that virtually no horizontal log in the building touches another one. There is a gap of varying sizes above and below each log. You are also right about the rebar keeping the logs in alignment. But there is some reciprocity there: The logs also keep the rebar in alignment. What I mean is that the skinny little rebar bearing all that weight would buckle if they were very long. Since they are snugly embedded in the logs, they can't buckle inside the wood so they easily bear the weight in compression. Also, since the rebar are not continuous for the height of the walls, the logs serve as the connectors for the individual pieces. The spikes going into the log above, and the log below a particular log are typically within a couple inches of each other. The log serves to bind them into a single steel column. The engineer had a name for the rebar appearing between two logs. He called it a "short column". I think that is a technical engineering term that means that the column is so short that it can't buckle in that length and can thus bear the rated compression load.
Q11. How did you set up your rigging in order to lift the windows?
A. (10/9/03) The rigging is a little too complicated to describe here so I have written a separate piece describing it. There is also an accompanying diagram. You can find them here.
Q12. My question is - did you use anything on the inside of the house?
A. I have been using Flecto's Varathane 900 Gloss for the logs on the inside of the house. Most people seem to prefer a satin finish but not me. I like it to be as shiny and glossy as possible. It could be that I will get sick of it after it is all done and get tired of it, but I don't think so. I just love the way the various grain patterns and colors look through that clear shiny finish. Since I am in charge, I am doing it the way I want and I'll have to live with the consequences. So far, I love how it looks.
Q13. Any problems with the chinking adhering to the shiny surfaces on the inside?
A. I haven't chinked the inside yet but I am not worried about adhesion to the shiny surface. I don't trust the adhesion of brick mortar to any surface. The galvanized nails are the only thing I trust to keep the mortar in place. As Skip taught, I only drive the nails into one log (the lower one) and fully expect a crack to develop between the mortar and the other log. The logs will move and change dimension somewhat and the mortar won't give at all. Contrary to what Skip taught, I spaced my nails about 2 inches apart.
Q14. Regarding your new employee, the pack rat: I was wondering how you could positively identify him each time. I thought that you could declare yourself emperor, and force the pack rat citizens to submit to a national identification system, such as being branded by a dye!
A. Regarding my employees (all of my employees are rodents), I really can't be sure I recognize one individual from another. I know some things for sure, though. Since the first one I caught died, and was much bigger than the other one(s) I have caught, I know that one was a different individual. I am also very sure that the ones I saw come into the building within a half hour of my evicting one, were the ones that I evicted. That is because they are nocturnal and aren't usually up and around during the day, unless I happen to throw them outside in the daytime.
I thought about marking them with magic marker like you suggested, but that would take a little doing, and then I couldn't be sure that the guy couldn't lick it off. It seemed like too much bother and not much payoff. If there is a nest of several individuals, and if I catch and evict them one at a time, I won't really know if it is the same one coming back in or not. Unless I actually see them come back in like I have done three times now. Whether it is one or many, having them show me where the holes are is a great and humiliating benefit. Once all the holes are really plugged, I expect that after evicting the last one, or the last few, I should be able to put a peanut on the floor and expect it to stay there indefinitely. I am looking forward to that day.
Q15. Have you ever considered putting down a flour like substance to maybe track where this little critter is going?
A. (4/14/04)Yes, I thought about flour in the way you suggested, but I couldn't think of a way to make a very long track. I'm afraid the flour would wear off long before they led me to a hole. Anyway, I think I have them licked now.
Q16. I am curious as to how you intend to handle the pack rat living in the blocked entrance to your house?
A. (5/24/04) I intend to keep them on retainer to periodically inspect my house for possible ways they can hack into it. To make it more convenient for them, I will provide living quarters in my wall, screened as it is so they can't get all the way inside the building. That way, I think they will be more likely to make the periodic inspections. I also benefit from having the pleasure of their company without having to act as their host and clean up after them. Instead of entering an empty building now, I know that PR will be up there in the loft and we can exchange greetings. I like having animals around and I have developed a certain attachment to PR by now. (I couldn't think of a fitting name for the packrat, so I simply refer to him by his initials, which, incidentally are the same as my first two initials.)
Q17. I was wondering that now that you are nearing completion of your home do you feel that the class was useful and more importantly worth the money?
A. (3/11/05) Even though I am not quite nearing completion of my home, I feel very strongly positive about Skip’s course and I would highly recommend it. There is no doubt in my mind that it was useful. I had quite a bit of building experience before I started but I still learned a huge amount of useful information from Skip that I don’t think I could have learned anywhere else. Although the fees might have been lower when I took his course I feel it was worth every penny and then some.
Q18. Looking back do you think a begininer can take skips course and build a similar home that you did?
A. (3/11/05) I do think a beginner can take Skip’s course and build a home like I did. In thinking about someone with a lack of experience, a few things come to mind. One is simply the confidence that you can handle the job. Skip’s class can go a long way to instill that confidence. That is one of the major things the course did for me. I wasn’t sure I could build a house before I took his class, but the moment I finished it, I had no doubts about it at all.
Another thing may be the lack of skill in using tools. Skip’s course can’t give you that skill. You can only acquire it by actually using the tools. But Skip’s method requires the absolute minimum of craftsmanship so lack of skill with tools isn’t actually too important, believe it or not. In my opinion, the most important skill you will need is to have a working knowledge of geometry and the simple laws of physics. You will need to be able to draw views of your project to scale and to transfer measurements from the drawings to the actual building, and from the actual building back to the drawings. If you can’t do that, you will have trouble. You need to have a pretty good feel for which measurements and placements are critical, and which aren’t. For example, getting the foundation level and square is absolutely critical. If you don’t do that, then it will screw up almost everything else from then on and there will be no way to fix it. Take the time to get it right at the outset and it makes things almost fall into place from then on.
Basic physics comes into play big time when it comes to handling logs. You need to know about the mechanical advantage of levers, pulleys, inclined planes, etc. Unless you have a big machine that can just pick up logs and set them down where you want them, you will have to figure out how to rig chains, cables, pulleys, snatch blocks, come-alongs, winches, ropes, shackles, and other gear in order to move logs and set them in place. You also need to have a common-sense understanding of dynamics. When a log is moving, it is going to follow the strict laws of physics, and if you haven’t planned and anticipated how it is going to move, there won’t be much you can do to change it once it starts moving. On the other hand, if you do understand the principles, you can rig up your equipment in such a way that the log easily moves exactly how and where you want it to. It’s great fun to do this, at least it is for me.
This brings up the subject of safety. If you have a lot of building experience, I think safety comes as second nature. But if you are inexperienced, I think it might be easy to get into dangerous situations and even to get seriously hurt. My advice is that before you take any particular action, you make it a habit to stop cold, be quiet for a moment, re-check all your rigging, jigs, tools, scaffolds, platforms, materials, and anything else involved to make sure they are where and what they should be, then while you are still quiet, mentally go through the entire sequence of the action and watch for three things: (1) Will the action happen the way you want it to? (2) If anything slips or breaks what will happen? (3) Are you in a safe position so that no matter what happens you will be out of danger? In my work, I have had one chain break, I have had two crane booms break, and one log slipped from its rigging and fell 10 feet to the ground. In each case, I was well out of the way by plan and was in no danger when things happened. Another good safety rule is to do only one thing at a time and pay complete attention to that one thing while you are doing it. That goes for such simple things as walking. Don’t be doing something with your hands while you are walking. When I walked on my scaffolding (which must have added up to many hundreds of miles) I tried to pay attention to each step by thinking through exactly what was going to hold up my weight when I stepped down. I would think, for example, that the plank I was going to step on was held on one end by a Z-bracket and resting on a log on the other end. Then I would think about what was holding up the Z-bracket, and so on, to make sure that nothing was going to break or give way. I think you can’t be too careful when it comes to safety.
Finally, probably the biggest effect inexperience will have is simply to slow the speed of the work. Without experience you can do the same job, maybe even better than an experienced person, but it will take a lot longer. That’s OK as long as you are having fun doing it. In my experience, as I gained the skill to do some job or other, I just got really good at it when I finished doing it. Then I went on to something else I had to learn from scratch. But it was all fun.
Q19. My question is have you had any structural issues with your house so far?
A. (6/4/04) I have had no structural problems and I have the utmost confidence in the strength and integrity of my building. As it happened, I was fortunate enough to be in the building when an earthquake hit. The structure was pretty much complete and the roof was on, but the windows weren't installed yet when the earthquake hit. You can read about the experience in the entry for 2/28/01. As for the strength of the log structure itself, you can read some of my comments on that subject in my answer to question 10.
Q20. Did you hire an engineer and did he or she have any comments about the butt and pass method?
A. (6/4/04) I did hire a structural engineer to go over my plans because the building department required it for the foundation. I had the engineer design and size the concrete column pads, and while he was at it, he checked the strength of the entire building.
When I took Skip's course, he said to drive the rebar pins in the walls every 3 feet (if I remember right). The engineer told me that that would hold up the building all right, but not in an earthquake. He had me put them in every 20 inches instead, which I did.
Q21. I see that you cut doors and windows in as you went rather than cutting them in after the fact. Did you use any reinforcement around the windows and doors or just put rebar on each side of the window and door?
A. (7/11/04) Yes, I put the rough window and door frames in before the logs (because my logs were so expensive and I couldn't get a good supply of long logs). I followed the 20" spacing of my rebar spikes right up to the window and door frames so there was typically a spike in each log within 6" of the frame. I also drove three 20d galvanized nails through the frame into the end of each log that butted a frame. In the front of the building I have a lot of short (18") wall logs between the windows. I didn't drive any rebar spikes into these. They are fastened only by the six 20d nails through the frames, three at each end. I figured that the load over the tops of the windows would be transmitted down perfectly well by the vertical members (2x10s) of the frames and that any rebar in those short logs would be ineffective. Other than what I just described, there was no other reinforcement around my windows and doors.
Q22. (7/6/05) I'm interested in doing the same and have a question on your CBA's. You mentioned that you have used several different types. Do you have any more pictures of them that you could email me as well as recommendations on which type worked the best?
?
A. When I first set the crane up, the CBA was just a formation in the bedrock that formed sort of a socket. I just set the end of the boom in that socket. The boom couldn’t slide backward because the rock cliff rose up right behind it. It couldn’t move sideways because there were projections of the rock sticking up on both sides. Unfortunately I don’t have a picture of that, but you can imagine what I’m talking about if you imagine clearing away the snow from the base of the boom in this picture.
When I needed to raise the boom for the first time, I moved it outside the building so that the boom went over the top of the back wall. To get it high enough, I found pockets in the in the ledges of the cliff behind the building that worked the same way as that original pocket did. You can see some of those ledges in this picture . It’s hard to see the perspective, but this picture was taken from the top of the cliff behind the building and looking almost straight down. The camera was at about the same level as the 12th course of logs, or so. At the bottom of the picture, you can see the rocks of the cliff, and you can see that the rocks form ledges or steps. I used two or three of these ledges for my CBA as the walls went higher and higher. I was able to find ledges that had sort of depressions in them so that the boom couldn't slip out sideways when it was in a position nearly parallel to the cliff. That worked until I ran out of cliff and I had to move the CBA inside the building.
You can see the tripod stand-off structure that formed the CBA I used on the inside of the building in this picture. The reason for standing the CBA out away from the wall was so that I could raise the boom almost vertical and it wouldn't hit my scaffolding. I used two different U-joints to connect the end of the tripod to the end of the boom. In this picture you see the second, and most successful, method. Here I drilled a vertical hole through the end of the boom and one through the end of the top tripod piece, then I wound a length of cable around the tripod piece to keep it from splitting, then the cable went through the hole in the tripod piece so it came out the bottom, then it went through the hole in the end of the boom, and finally wound around the end of the boom to keep the boom from splitting. Then the cable was clamped to itself. Actually, the way it was wound, there were two cables going between the CBA and the boom. You can sort of see it in this picture. It is a dark line about a foot long slanting steeply down to the right between the end of the CBA and the end of the boom.
The other U-joint can be seen in this picture. It is the pyramid sort of thing made of 3/4" EMT at the right of the picture. It is fastened together by two threaded rods that run through the nearly vertical pipe on the right and the horizontal pipe at the left. One of these pipes went through a vertical hole in the end of the CBA and the other one went through a horizontal hole in the end of the boom. They provided the pivot axes to allow the boom to swivel without being able to twist.
It was a great idea, but the compression forces were so great that some of the tubes buckled under load. You can see in the picture that the top of the nearest vertical tube is buckled at the top. Fortunately the thing didn't break, but when it buckled like this, I replaced it with the cable arrangement I already described. I still have that old EMT U-joint just for sentimental reasons.
Q23. I guess my ?? is the timing, how long about do things take?? Are you having fun? Any words of wisdom?? Thank you so much!
A. (7/31/05) The way I am building my house, it is taking a very long time. On the other hand, some people who have taken Skip’s course have built their homes very quickly and at pretty low cost.
I have been working on my house for over ten years now but I have been doing almost all the work by myself. I have also consistently underestimated the time it would take me for any particular project.
Fortunately for me, I don't have any real time pressure to finish. Since I enjoy the building process itself more than I think I will enjoy using the finished building, I don't have any internal pressure to finish the job quickly either.
I realize that most people are more eager to get their building built right away than I am, and that attitude will probably help them get it done much faster than I will. There's nothing wrong with that unless you get yourself in a bind with an unrealistic schedule.
Some things that might make your project go a lot faster than mine might be
. Work on it more than two or three days per week.
. Choose a site that is simpler, like being accessible, reasonably level, dirt instead of rocks, etc.
. Get help, like friends or subcontractors, instead of doing everything single-handedly.
. Use some heavy-duty machinery, like a tractor, a bulldozer, a boom truck or some other kind of log lifting machine, a portable sawmill if you are going to rip a lot of logs, a cherry picker instead of scaffolding, standardized concrete forms, etc. In my case, I rigged all my lifting devices using chains, pulleys, cables, come-alongs, winches, etc. I also ripped a lot of logs by hand with a chainsaw and erected scaffolding to reach things, some of which I made myself. All this took a huge amount of time.
. Stick to Skip's advice and use piers instead of a foundation, and cut door and window openings after building with full-length logs. It takes a lot more time to do it the way I did.
. Stain or varnish or otherwise finish the inside and outside of the log walls within a few weeks of preparing the surface. In my case, I had to plane, scrape, gouge, rasp, and sand those surfaces a second time because they had discolored and deteriorated over the intervening time. Big mistake.
I'm not suggesting that you have to do these things necessarily, or that you rush your job. I'm only suggesting that you think about your schedule and how important it is that you follow it. I think the objective should be that you thoroughly enjoy the process once you make the decisions as to how to proceed.
As for having fun, yes, I am having a huge amount of fun. I thoroughly enjoy almost every project involved with building my house. (The exceptions might be working through the various permitting processes.)
And as for words of wisdom, you will have to take a look at my website and judge for yourself. From some points of view, some of the ways I go about doing things seem pretty stupid.
Q24. How experienced were you in home building prior to your project?
A. I probably had more building experience than most people. When I was a young boy, I built a lot of "clubhouses" in the backyard, but probably not more than most young boys do. When I was a young teenager, I helped my dad build a garage so I learned how to mix mortar and lay up blocks, how to build and install rafter trusses (I don't think it is legal to build your own trusses any more), and I put on the roof including the shingles. Then I worked as a carpenter's helper for two summers during High School and got experience framing and learning how a house is put together. In college I studied Engineering Drawing which gave me a lot of useful skills for designing and building. During one summer before graduate school, I worked as a pile driver's helper where I got a lot of experience using a chain saw. During that summer, I built a simple shed addition onto my uncle's house, involving pouring a slab and footings, stud walls, trusses (again), siding, roofing, a window, and a door. In the houses I have owned, I have finished one basement including installing a bathroom and hanging two doors; I tore out and reinstalled a shower in another house; I re-plumbed the house I am now living in; I have modified and extended the wiring in all three of the houses I have owned; I have always been my own plumber, electrician, carpenter, painter, and general handy man. The only floor mounted power tool I have ever used was a big radial arm saw in a lumber yard where I worked, but I have used a skil-saw and a quarter inch drill a lot. During the building of my log house was the first time I ever used a half-inch drill. I have always thoroughly enjoyed using simple hand tools, especially shovels, picks, hammers, saws, axes, knives, etc., but I have never used a table saw, drill press, or any other floor mounted tool.
So in summary, I would say that my building experience was probably above average, but still far below that of a professional builder. I think more important than the experience is the attitude. If you want to work with a certain tool and you enjoy it, you will soon become skillful with it if you work with it.
Q25. How long ago did you take Skip's class?
A. (10/7/05) Well, I took it May 18-19, 1991, so that would make it nearly fourteen and a half years ago. Time really does fly when you're having fun.
Q26. Looking back to the beginning of your project, is there anything that wasn't covered in the course that I should definitely be aware of?
A. I'd say that Skip's course was very comprehensive and complete. After my experience, I think there were only two things I think he should have added. The first probably wasn't invented yet when I took the course and maybe now it is included, but that is a product called the Log Wizard. I describe it in my glossary. (see the entries for 'Gwizard', 'Gwizzing', and 'Gwiz Station'.)
The second one is that Skip never mentioned come-alongs in the class I took. In my opinion, come-alongs are the most useful and versatile of all tools for manipulating logs. I think they are greatly superior to block and tackle for most purposes. Check out the entry 'Come-along' in my glossary for a description and a picture, and for just one example of how I used them, take a look here.
Q27. How long had your logs been down before you used them? Were they relatively seasoned or would you consider them green?
A. Most of my logs (85% by length) had been down at least five years in the log yard of my supplier. Then it took me another year or two to get them into the building. The other 15% was harvested from my property. Those were mostly dead standing trees or naturally fallen trees that had been dead for two years or so. Only a couple of trees were cut green and those ended up at the very peaks of the gables when I was running out of logs.
Q28. If you drive rebar every 2’ or so and wait to cut your window and door openings at the end, do you have to cut through the rebar as well?
A. I can’t answer this question from direct experience because I installed my rough window and door frames as I went. But I can answer it from my recollection of what Skip taught, as well as from my own personal opinion on the question.
First, of course, is that you definitely do not cut through rebar with a chainsaw. When this question was asked in the class I attended, I remember Skip sort of dismissing it as not too important. I remember him saying something like, you can plan ahead for window and door placement if you like and then avoid placing rebar where you will have to cut, but since you don’t have to decide precisely where the windows and doors go, you will be able to choose to cut where there are no rebar. The locations of the rebar are pretty easy to see since there is usually a significant gap between the logs in most places.
My personal answer to the question would be that you should plan on fairly precise window and door placement ahead of time. Then I would suggest definitely avoid driving rebar where you will cut. I would also not drive rebar in the interior of window or door openings. That would just be extra work and if you don’t do it, then you can remove one log section at a time when you finally cut the opening. Otherwise, those sections would all be pinned together. You certainly don’t need spikes in those sections to hold the logs in the wall; the rest of the spikes will adequately hold the wall, just as they will in the final product.
Q29. I was surprised to see that you were refinishing some of your logs. What was the reason that you are redoing yours?
A. Actually I am not refinishing any of my logs because I never finished them in the first place. What happened was that it took me so long to get the roof on and to get started finishing the logs, they had deteriorated due to UV light by that time. In the second picture here you can see the extreme condition of the oldest log in the building by the time I got around to finishing it. It is the bottom log and you can see on the extreme left it was nearly black from UV and mildew and fungus and whatever else got into it. Then you can see a section of bare wood where I ground the black stuff off. The two logs above that one are also ground off ready to stain. Then on the right, you can see the final stained logs. I used an oil based stain on the outside of the building.
The same thing happened on the inside of the building only to a lesser extent. But on the inside I am using Flecto Verathane 900 Gloss. In the fourth picture, and the last two pictures here you can sort of see what the final product looks like on the inside.
I tried quite a few different things for preparing the logs for both staining and varnishing and finally settled on a combination of planing, scraping, gouging, and chiseling. I use a power 3 Ľ” hand planer for as much as it can reach. It can’t get close to corners or right up against the log above or the log below, and it can’t get into concavities like around knots etc. So after I plane as much as I can, I switch to a scraper. That’s a lot of hard work, but it works pretty well. Then for right up against edges and some other tight places, I use a big gouge and for some hard to reach flat spots, I use a chisel. That’s part of the reason this project is taking me so long.
Early on I tried some other methods. I tried bleach and oxalic acid. They sort of worked and brightened up the wood, but my gold standard was pure, bare, white wood like you get when you chisel into it. Neither the bleach nor the oxalic acid got it looking that good. Then I tried pressure washing and it didn’t leave it any better. It also left it fuzzy so I had to sand or scrape it anyway and the water mess offset the extra work so I gave up on that. I also tried different sanders. In fact I did quite a bit of the outside using a DeWalt 8-hole palm sander that would get up to very high RPMs if you would let it rev up. When it was really spinning it could cut pretty fast. But I couldn’t take the dust. Even though I was working outside with a respirator, it would get all over my clothes and tools and I would track it into my trailer and everything was always dusty. I couldn’t take it so I quit sanding altogether after a while. The planer makes a big chip mess and throws some dust around, but it is not nearly as bad as the sanders.
I like working with wood and I get a lot of pleasure watching ugly discolored wood turn beautiful as I work on it. This keeps me going in spite of always being on the ragged edge of repetitive stress injury, from using the scraper in particular. Good thing I don’t have a tight schedule to meet. Also, this way I am pretty sure there won’t be another house anywhere built exactly like I am building mine, for whatever that’s worth.
Q30. Is the butt and pass corner hard to do? A. I’d say the butt and pass corner is easy to do. First of all, you don’t have to worry about cutting the logs to length. One of the logs just hangs out in space so its length is not critical. The other one just butts up against it so you don’t have to measure or cut anything. You just need to worry a little about keeping the joint plumb, but that’s not critical either.
The only thing I can think of that makes the joint hard at all is that you need to drive one spike into the joint sideways. You drive the spike into the passing log so that it penetrates the butting log along its axis. The problem with this is that once the logs get very high, you need something to stand on in order to drive the spike. I made a little wood platform that was fastened to a hanger that I made out of ľ” EMT electrical conduit. The EMT was bent so that it could be hung over the log wall and the platform stuck out so I could stand on it and drive the spikes. It was useful for all sorts of other purposes when I needed a place to stand to do some rigging or whatever.
Q31"Log Home pictures from 2003, Part 2".
In picture 4 you show how you draw a line to cut the boards.
My question is: Do you then cut the boards in "free hand" with the chainsaw or use some kind of transportable milling equipment?
A. (9/21/10) I do cut the boards freehand with the chainsaw. I use an alternating rocking motion in which I am cutting on only one line at a time. I cut the log horizontally so the log is positioned as it is in the pictures. I start on the right-hand corner nearest to me and cut at about a 45 degree angle starting right at the corner. At this point, I am breaking the rule I just stated because the saw is cutting along two lines at once. The two lines are perpendicular and meet at the corner I start at. So it is easy to see both lines and make sure the cut follows both the line closest to me and the other one across the end of the log.
This establishes a triangular plane that I want to maintain throughout the cut. When that triangular cut is nearly all the way through the line on the end of the log, I set the saw teeth in the front side of the log and then I start my alternating pattern.
With the teeth set in the front side, the chain can’t wander away from the front line so I don’t have to look at it or worry about it. Instead, I lean far enough over the log so that I can clearly see the line on the back side of the log and I can see the tip of the saw bar cutting along that line.
I proceed to cut along that back line keeping the teeth set all the while and watching and controlling the progress of the tip of the bar to make sure it follows the line. I cut from that roughly 45 degree angle to at least 90 degrees, or maybe even farther. It depends on how it feels. If it gets hard to follow the line, or if I think I am far enough, I stop and switch to the second cutting mode.
For the second cutting mode, I stand up straight, pull the teeth out of the log and with the saw bar loose in the kerf, I use the close part of the bar to cut the front line. I let the middle and end of the bar move around in the kerf while I am concentrating on making sure the near side of the chain is cutting right on the line. The kerf keeps the bar in the plane of the cut and since it is away from the end of the cut on the back side, it can’t wander away from that back line.
The cut on the front side is very similar to the very first cut, but instead of having to watch two lines, I only have to watch the front line and make sure that the bar always feels loose in the kerf. I do that by feel. If I’m not careful, the bar might gouge a track in the top or the bottom of the kerf and do some scarring. That really can’t be avoided, but you can try to keep the scar depth to a minimum. You are not going to get a smooth surface using this method no matter how careful you are. You will, however, get a very flat surface if you scribed your lines carefully.
When the progress on the near cut gets slow, or whenever you think it is enough, then set the teeth on the near side again, with the bar at a big enough angle so that the chain is at the end of the cut. Then lean over the log and cut on the back side as before. Then just keep alternating between these two modes until you are done.
When I get between half and three quarters of the way through the log, I pick up a couple of thick twigs a little thicker than the kerf. I whittle them into crude wedges, or if they are already the right size and tapered I use them just as they are. But I jam these into the kerf, one on each side far enough away from where I am cutting so they don’t get in the way. These will take the weight of the wood on top of the cut so that when you come to the end of the cut, the wood won’t sag and split of its own weight. If the wood is big and heavy, I might use four such wedges so that as the bar emerges at the end, it comes right out and the wood stays right where it is.
What I found works really well to finish the surface for use on my outdoor decks, was to use a floor scraper. It easily takes off the fuzz left by the saw, it knocks down the high spots, but it leaves a lot of scars that makes it obvious that the cut was made by a chainsaw. I have found that people like to see those scars. It leaves no doubt that the wood was milled by hand.
Q32 I have a chinking project coming up and wonder if you would happen to know the amount of water up to that hole in that plastic jar that you measure the water for your mortar mix.
A. (4/21/12) The plastic jar up to the hole holds 44 fluid oz. of water. The double coffee can container for the mortar mix holds 196 fluid oz. of mortar mix. That's 4.36 times as much mortar mix as water by volume. You can see a photo of the two vessels here. You can barely make out the hole in the plastic jar on the left. You can see that the mortar vessel is two coffee cans wired together and duct taped. The wire also forms handles near the center of gravity of the vessel which makes it easier to dump. You can see a video of how I measure out the water and mortar mix here
©2002, 2003, 2004, 2005, 2006, 2010, 2012 Paul R. Martin, All rights reserved.