Log Home Pictures from 2019, Part 2 of 3
. . . . . . . . . . . . . . . . . . . . . . . . . . . . . . . . . . . . . . . . . . . . . . . . . . .This is Page 2 of 3. Go to page 1 2 3 next prevOther years: 1991 1992 1993 1994 1995 1996 1997 1998 1999 2000 2001 2002 2003 2004 2005 2006 2007 2008 2009 2010 2011 2012 2013 2014 2015 2016 2017 2018 2019 2020 2021 2022 2023 2024 2025
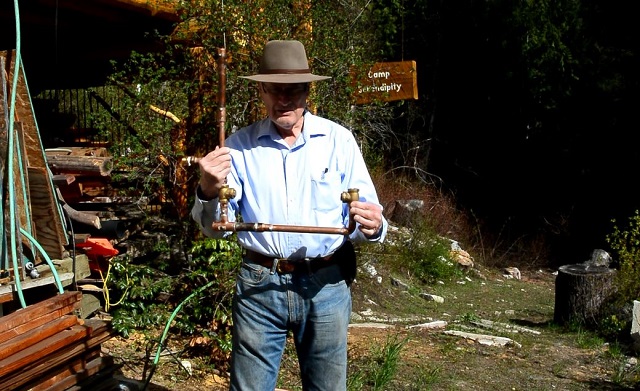
4/30/19 As another diversion from going after the final inspection for the cabin, I spent some time nurturing my giant sequoia trees by setting the irrigation system back up now that the winter logging activity has stopped. As part of it, I built a hydraulic ram pump that I am holding in the picture. I will set it up in the creek just below the springbox and have it pump water up over the ridge and down to Andrew on the other side. Andrew is higher in elevation than the spring so I can't use gravity feed for the irrigation like I do for all the other trees.
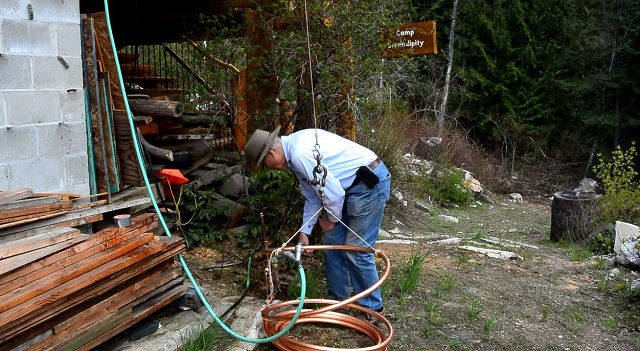
4/30/19 Since I didn't know whether or not the ram pump was going to work, I set up this test apparatus at the cabin to test it. The 40-foot coil of 1" copper pipe is what I will use to feed the pump. In this test system the pump is hooked to the lower end of the pipe and the upper end is fed by the garden hose from the cabin. The end of the pipe is held up off the ground by that rope bridle and the porch crane. Using the crane allows me to adjust the height of the end of the pipe up or down to simulate different head pressures. I wasn't sure exactly how much head I can get up at the creek in 40 feet.
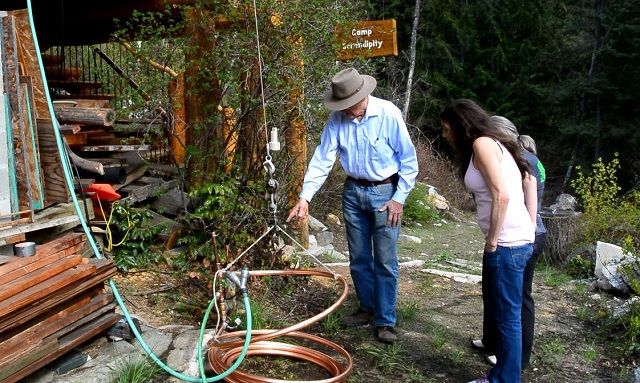
4/30/19 This picture was taken the moment the pump first worked successfully. A couple of visitors just happened to stop by and witness the happy event. It was also recorded on video. The pipe and pump are now ready to install up at the creek.
5/8/19 Here the copper pipe is lashed to the Trapper Nelson packframe ready to be carried up to the creek for installation. You can see the wire mesh strainer fastened to the end of the pipe.
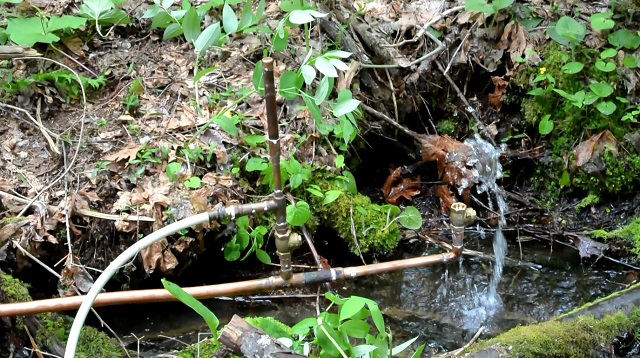
5/8/19 Here is the pump in full operation up at the spring pumping water up over the ridge and down to Andrew, the struggling giant sequoia. The pump squirts a geyser of water up in the air about once a second while it is pumping. You can see the last squirt still up in the air in this picture. You can see the installation of the pump in this video.
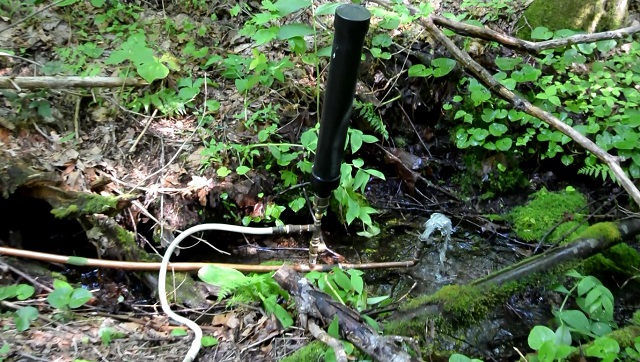
5/29/19 Here the pump has been retrofitted with a bigger compression chamber. The original smaller one had evidently filled with water so the pump was unable to get water all the way to Andrew. Now, with the new chamber, there is a nice flow out the end of the hose.
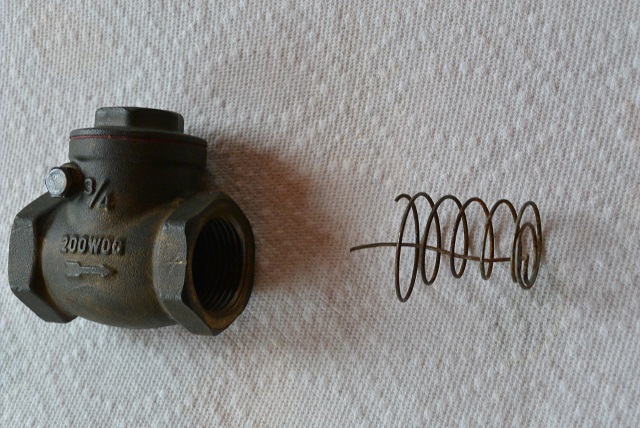
6/25/19 The hydraulic ram pump has been giving me trouble. It ran for a while but then stopped. The valve on the end of the pump just stayed shut. I figured that it needed a spring to push it back open to get it to cycle again, so I made this spring with a plunger to do the job. This is Modification number one, or Mod #1.
6/25/19 Here Mod #1 is installed in the check valve simply by screwing the spring into the threads on the check valve.
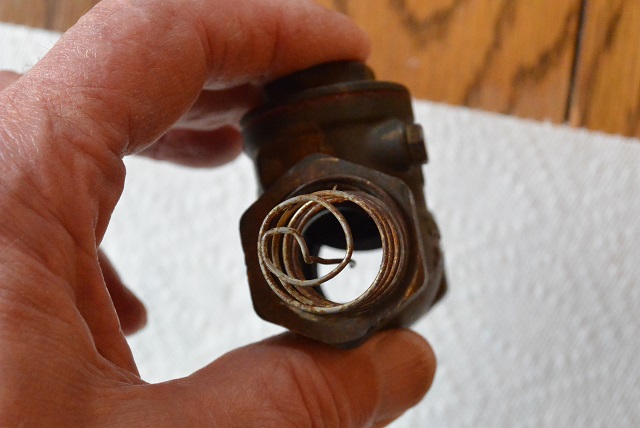
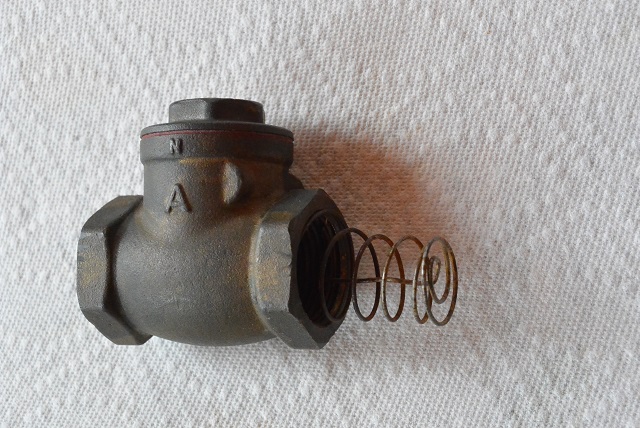
6/25/19 Here is the check valve with Mod #1 installed viewed from the top. Although this worked for a while, it also eventually stopped and wasn't reliable.
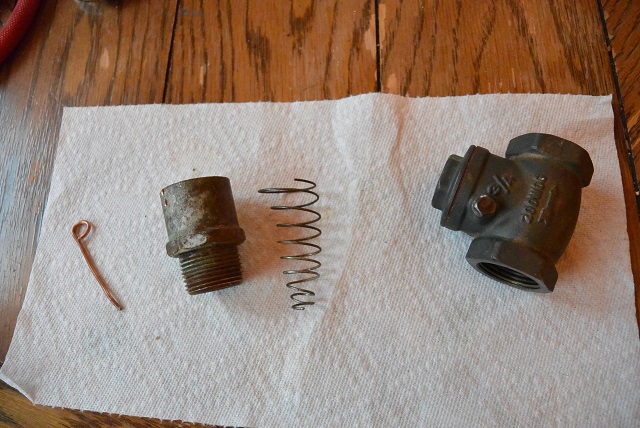
6/25/19 I decided to make a better version, which would be adjustable, so that I could fine tune it to a sweet spot that would keep the pump running. Here are the parts to make Mod #2. I used the same spring that I took from Mod #1. I bent the plunger into a smaller diameter coil as you can see here.
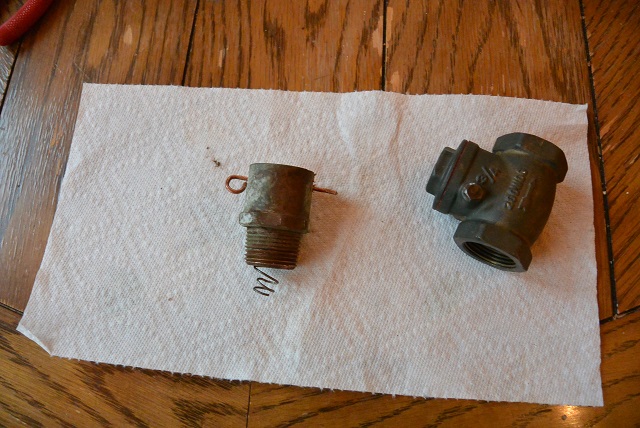
6/25/19 Here is Mod #2 assembled and ready to be installed in the check valve.
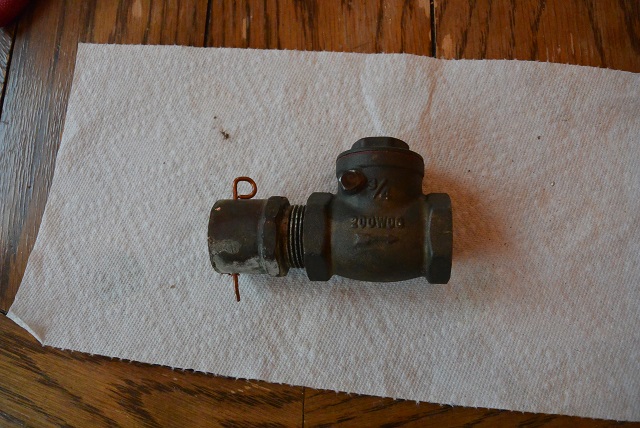
6/25/19 Here Mod #2 is installed in the check valve. Unfortunately, Mod #2 didn't work any better than its predecessors, so I gave up for the week. My plan is to make Mod #3 when I am back home in Seattle and have the availability of more parts and tools, and I also sort of know what I need to do to make it work. We'll see.
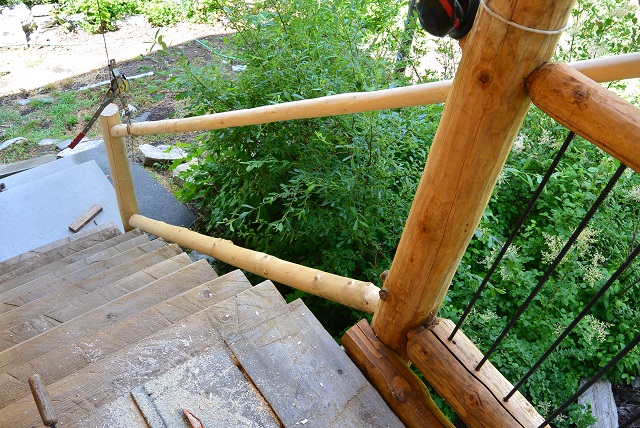
6/26/19 Interspersed with my ram pump tribulations, I found time to work on the back stair railing system. Here you see the lower mortise/tenon joint for the upper rail completed with the upper one still to go. The next day I finished the upper joint but I didn't take a picture of it. I also drilled all the baluster holes and their weep holes in the lower rail before I left for home for the week.
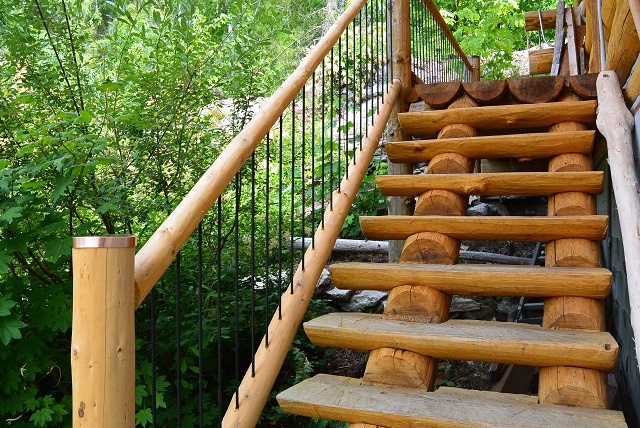
7/11/19 Except for staining, the back stair railing system is finished. In fact, all outside railing systems are finished. I just have the inside railings to go. Here you see the back stair railing from down below.

7/11/19 This is a view of the entire railing system on both sides of the stairs. You can also see the back door, the crawlspace door, and the back stoop.
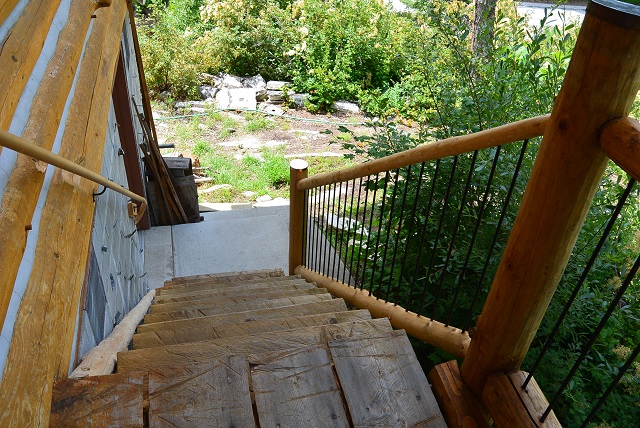
7/11/19 Here is a view of the stair railings from up on the back porch.
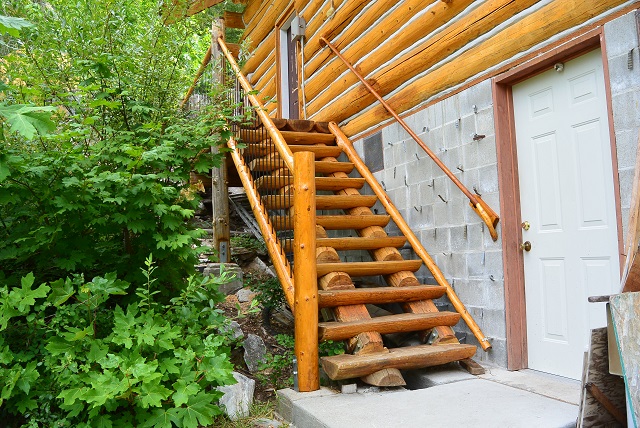
7/24/19 Here the stair railings have been stained which pretty much completes the last of the railing projects on the outside of the cabin.
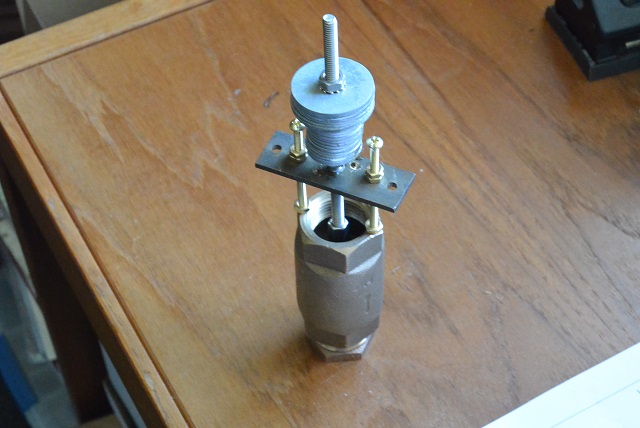
7/28/19 This is the latest attempt at making a waste valve system that will make my ram pump work. This one is gravity-operated. The weight is adjustable by adding or removing washers.
Pictures from other years:
1991
1992
1993
1994
1995
1996
1997
1998
1999
2000
2001
2002
2003
2004
2005
2006
2007
2008
2009
2010
2011
2012
2013
2014
2015
2016
2017
2018
2019
2020
2021
2022
2023
2024
2025
©2024-2025 Paul R. Martin, All rights reserved.